Hands-on History: Make an Early American Quilt
One of my tween’s favorite projects for history class was this early American quilt craft. It’s one of the many American history activities I added into our homeschool history lessons.
This year, we attended a historical reenactment for our early American History studies. During our visit, the girls were intrigued by women quilting, so I used their interest to complete a school project that would connect them to this part of history.
I helped them learn how to sew a quilt of their own.
This post contains affiliate links.
As with other hands-on history projects, we made the quilts doll-size, so the girls could gain valuable experience and confidence before tackling something larger.
American Quilting History
Quilts became popular in America during the late 18th and early 19th centuries.
Although we often think of quilts being made from scraps of fabric, that’s not how they began. In early America, fabric was made by hand, so it was often reserved for necessities in most households. Quilts during this time were luxury items, ornate projects made by the wealthier ladies to show off their fine needlework. They took a lot of time to create, time many women didn’t have to spare.
After the Industrial Revolution, fabric became more plentiful and affordable, so families could now purchase textiles to meet their clothing and household needs. In the mid 1800s, reasonably priced cottons were readily available, in a wide variety of prints. This led to block quilts, those made of blocks sewn together in rows, becoming quite popular.
Although quilts date back to Ancient Egypt, the Industrial Revolution was a main reason for becoming the more frequent household items we know today.
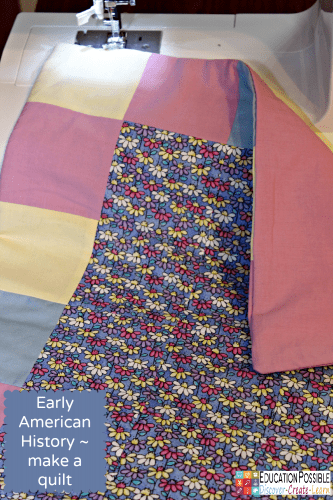
Early American Quilt Project
This was one of our favorite pioneer life activities!
As I said, the girls made small versions since they are still working on their sewing skills.
Keep reading for instructions on how to create a 35 piece block quilt, measuring approximately 17” x 24” once complete.
You’ll need:
- Cotton or brushed cotton fabric. Choose the colors you want for the design. How much fabric you need depends on how many blocks you’re going to cut out of each color. You also need one piece of fabric that measures at least 17″ x 24″ for the back of the quilt.
- Quilt batting or similar stuffing, at least 17″ x 24″
- Thread
- Sewing machine (unless hand sewing)
Step 1
Cut 35 blocks of fabric, each measuring 4” x 4”. The number of blocks you’ll cut out of each fabric selection depends on your quilt design.
The important thing is to cut a total of 35 blocks.
For our quilt, we chose 4 pieces of fabric, cutting out 15 patterned squares and 20 solid squares (7 yellow, 7 pink, and 6 blue).
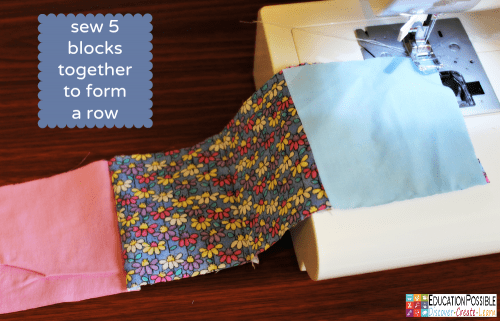
Step 2
Lay out the fabric blocks in seven rows of five.
Working one row at a time, with right sides together, pin each of the five blocks to the one next to it, creating a row. Sew, using a ¼” seam allowance, and press the seams open.
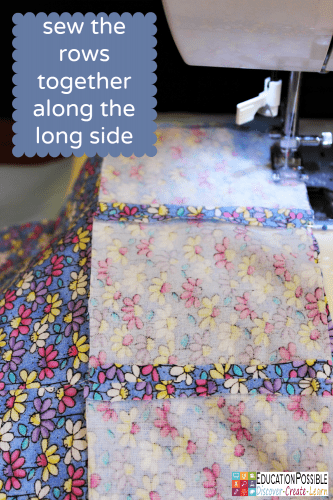
Step 3
Pin row one to row two, right sides together, along the long edge. Sew the two rows together, using a ¼” seam allowance. Continue sewing on each subsequent row using the same method. When you’re finished with all seven rows, press the seams open.
Tip: Make sure you’re not only sewing the correct rows together, but also that the left and right sides match the pattern you planned. We’ve flipped a row around before and it changed our design.
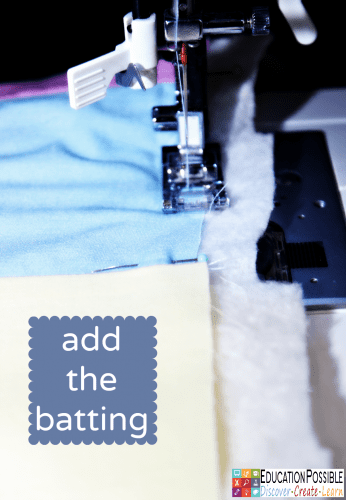
Step 4
Pin and sew the batting to the back side of the blocks, using a 1/4″ seam allowance.
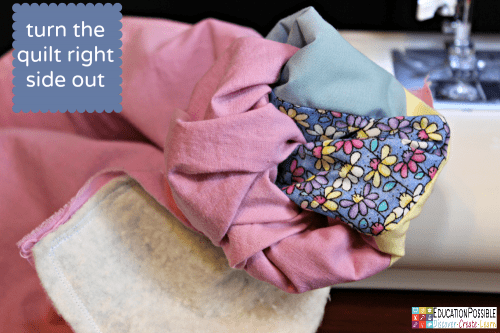
Step 5
With right sides together, pin the back piece to the top piece you made out of the blocks. Using a ¼” allowance, sew the top to the bottom (sewing through all three layers), making sure to leave a small opening to turn the quilt right side out.
Turn it out and sew the opening closed. Iron.
This was one of our favorite history projects. The girls felt so accomplished after finishing their quilts. I found it to be a great way to keep the learning going after a field trip.
More Pioneer Activities
Use these hands-on activities as part of your study of the American pioneers.
- Braided Rug Craft
- 6 Pioneer Recipes to Make with your Teen
- Pioneer Crafts for Middle School
- American Pioneer Notebooking and Activity Unit
Have you ever considered making an early American quilt with your kids?

Latest posts by Megan Zechman (see all)
- Easy Pumpkin Crafts - August 21, 2023
- Middle School Geography Curriculum - August 11, 2023
- Outdoor Geography Activities - August 4, 2023
6 Comments
Comments are closed.
I LOVE this! A few years ago Anna did a literature fair project on a book “The Quilt Walk” — and she made a quilt as a part of this. It was such a memorable time for she and I – a dear friend taught us to quilt and that quilt hangs proudly in Anna’s room today. 🙂
What a great memory Mary! I’ll have to check out that book too. Mine were so proud to make their own quilts. I think they’ll tackle a larger one eventually. Thank you so much for sharing 🙂
This is such a great idea! We’re studying American history this year as well, and I’ll have to remember this when we get to the Industrial Revolution. Thank you! I’ll pin for my memory!
Thank you Jennifer. There are so many great projects to do when working on the Industrial Revolution. I hope your family is enjoying studying American history as much as ours is. Lots of hands-on fun!
I love this project! Great idea to start small too- I still haven’t finished the first quilt I started! hehe! Thanks for linking up at the Thoughtful Spot Weekly Blog Hop! We hope you stop by again next week!
We have too many projects like that too Samantha. That’s why when we came home and they asked about making one, we did it right away. I’m so glad I did because they were so proud of themselves.