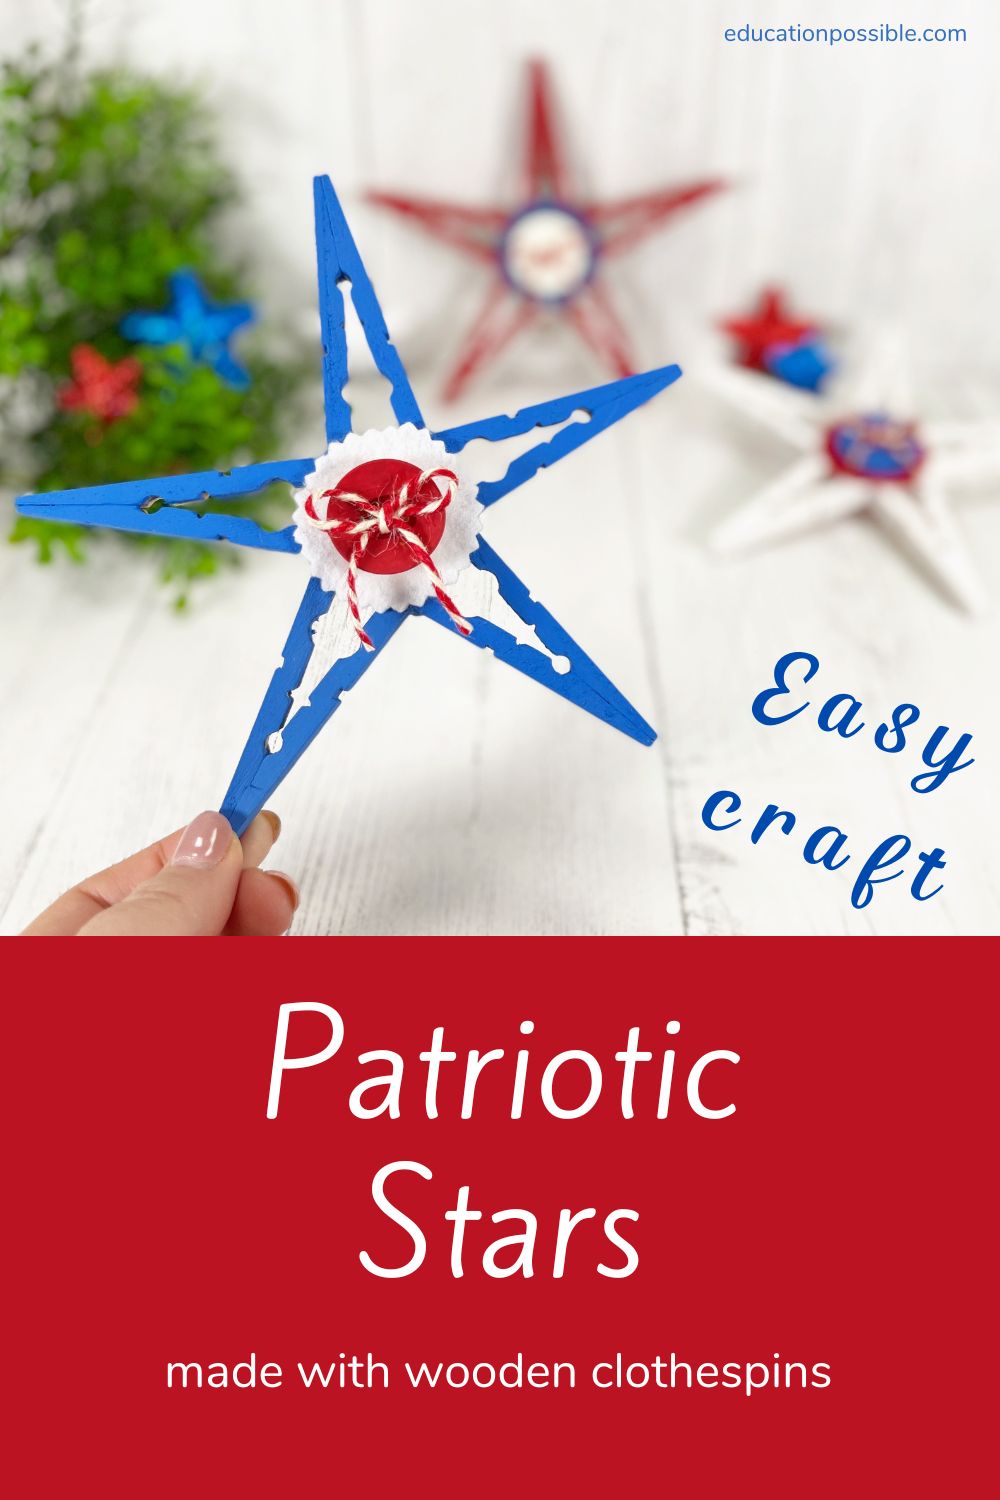
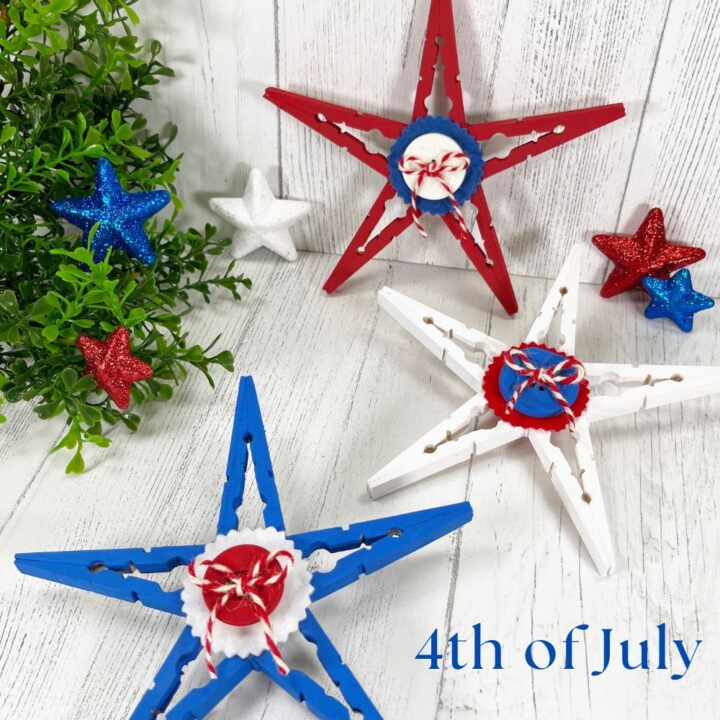
DIY 4th of July Clothespin Stars
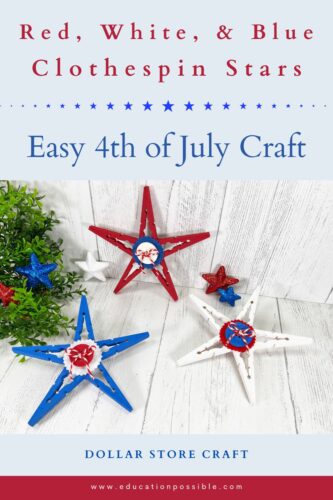
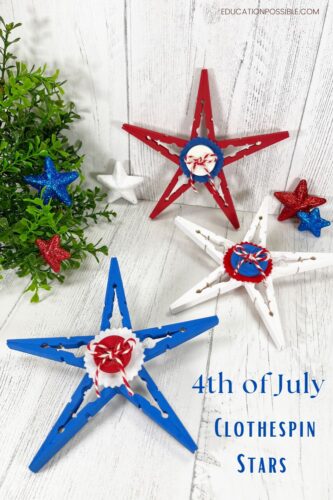
These DIY 4th of July clothespin stars are so patriotic. The red, white, and blue colors and the star shapes make this the perfect July 4th craft.
Working on a project like this together as a family is a wonderful way to celebrate the summer holiday. After you finish the stars, you can use them to decorate your home for Independence Day.
Tweens will love how easy it is to put these patriotic stars together and you’ll appreciate how inexpensive they are to make. In fact, you can get most of the materials from the Dollar Store and your craft closet.
Summer is the perfect time to keep everyone busy with a cute patriotic craft. It’s a fun way to spend some time together.
Table of Contents
DIY 4th of July Clothespin Stars
The process of creating a DIY clothespin star is so quick and enjoyable, you might end up making a whole bunch. And since they’re so cheap, you can make as many as you’d like!
The best part of this summer activity is that everyone can get involved in the crafting process. It’s such a fun summer activity for families.
You can either have everyone make their own or work together to make a set number for the family. Tweens will love making a few to decorate their own rooms.
These stars are the perfect 4th of July activity. You can also use this DIY craft to celebrate any other patriotic holiday, like Memorial Day or Flag Day.
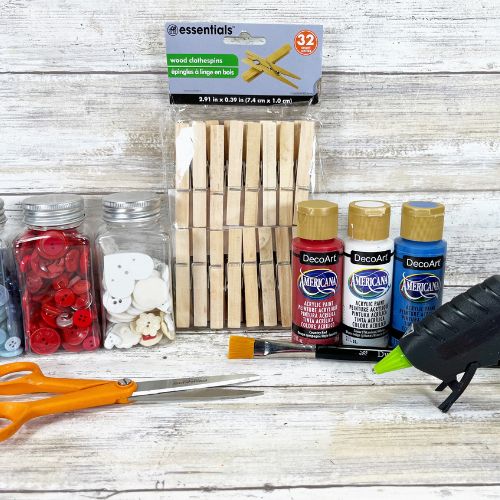
Materials Needed for the July 4th Stars
The beauty of this craft is that it requires a handful of inexpensive supplies. Fewer materials make it easier to get started.
All you’ll need is the following supplies. These are affiliate links.
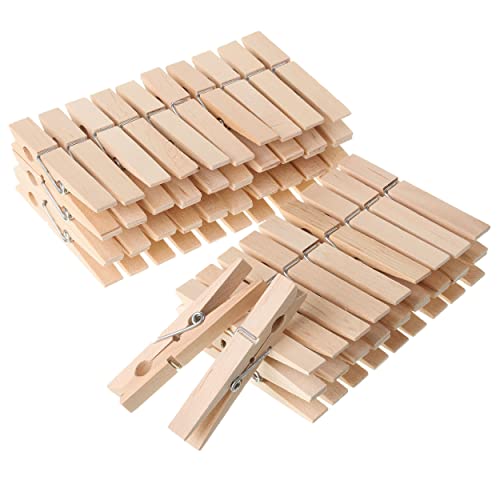
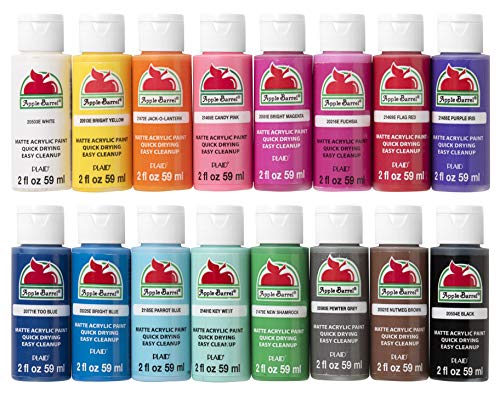
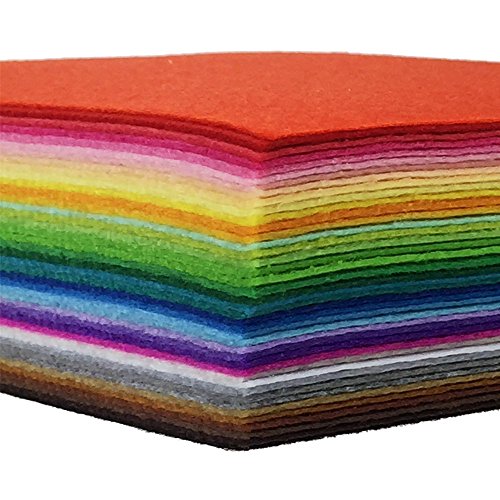
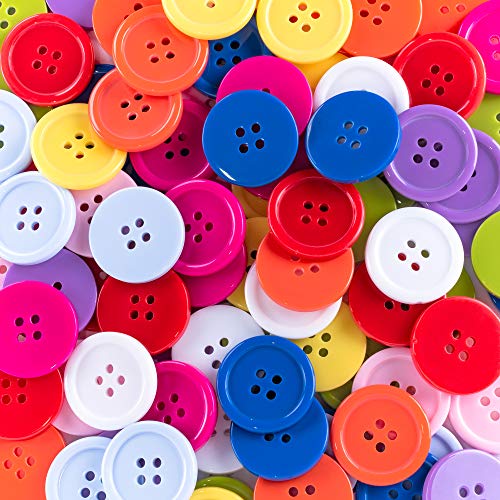
Wooden Clothespins Acrylic PaintFelt Fabric1 Inch Buttons
Make sure you check your craft closet to see what craft supplies you have on hand. Then, head to your nearest Dollar Tree or craft store for the rest.
How to Make a Patriotic Clothespin Star
You’ll have no trouble creating these 4th of July stars. It’s one of the simpler DIY projects that doesn’t require any special skills or tools.
The main idea is to glue the wooden clothespins together into a star shape. When you use the provided template, you’ll have no trouble at all.
All you have to do is create the star, paint the clothespins, and then add the felt, buttons, and twine decorations. Finally, hang up your stars and enjoy them for the holiday or the whole summer.
These 4th of July clothespin stars are not only fun to make but they look great too! In no time, your family can create a set of them for the house or individual rooms.
Just follow the step-by-step instruction below to make your own patriotic decoration.
How to Display the DIY Clothespin Stars
Once you’ve created your beautiful stars, it’s time to display them. It’s so much fun to show off these cute little decorations – they look great on windows, the front door, or walls.
You can also hang them from trees and porches.
If you’ve made a bunch of stars, string them together with some twine and turn them into festive garland to hang around the house.
Instead of hanging them, you can place them on your table or mantle to create a patriotic centerpiece for a 4th of July party.
No matter how you choose to display them, your DIY stars will definitely stand out this summer!
So get the family together and start crafting these patriotic decorations.
More 4th of July Activities
Looking for different ways to celebrate the 4th of July as a family? Here are more great ideas.
- Play Liberty Bell Timeline Trivia
- DIY Fourth of July Wreath
- Teach Kids about Flag Etiquette
- Festive Red, White, and Blue Wood Star
The time you spend will be worth it when you see how cute these handmade stars look in your home. They’re the perfect way to show off your patriotic pride.
These patriotic clothespin stars will definitely bring some extra sparkle and fun to your Independence Day.
Happy 4th of July!
Patriotic Clothespin Stars Craft
Using simple supplies from the Dollar Store, create this quick and easy trio of 4th of July Stars in just about 30 minutes.
Materials
- Clothespins, Wooden Spring-Style
- Acrylic Craft Paint in Red, White, & Blue
- Buttons, 1” in diameter
- Craft Felt in Red, White, & Blue
- Natural Jute Twine
- Marker
Tools
- Star and Circle Template PDF
- Glue Gun and Glue Sticks
- Paintbrush
- Pinking Shears or Scissors
Instructions
STEP ONE
The first step is to gather all supplies and download the star and circle template pdf.
STEP TWO
Count out 5 clothespins for each star. This will give you a traditional star shape.
Remove the metal spring from five clothespins, so that you have 10 wooden halves.

STEP THREE
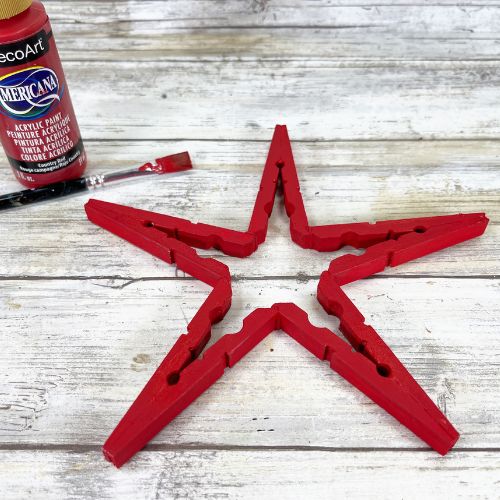
Line up five clothespins (10 halves), each in a V shape on your work surface.
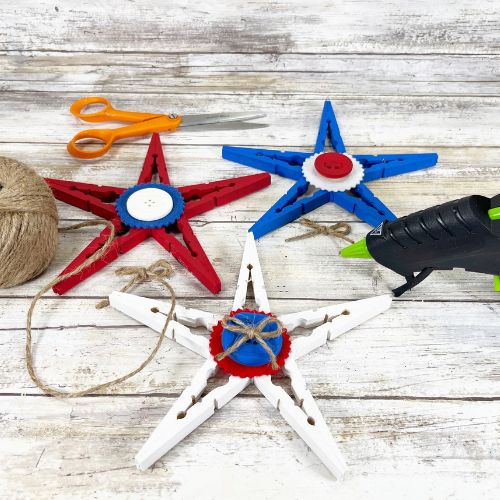
Attach the wooden clothespin pieces together at the tapered end with a glue gun and glue sticks, using the photo as a guide or the handy template.
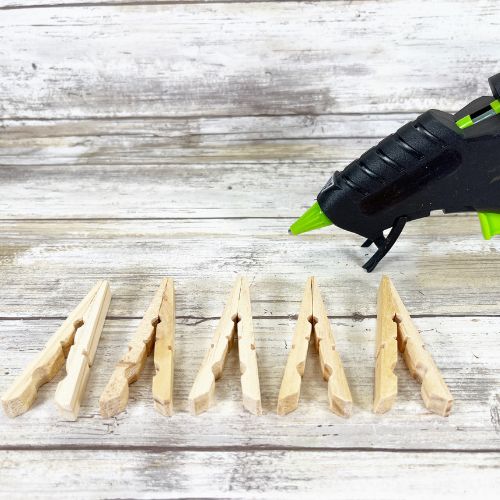
These will become the points of the star.
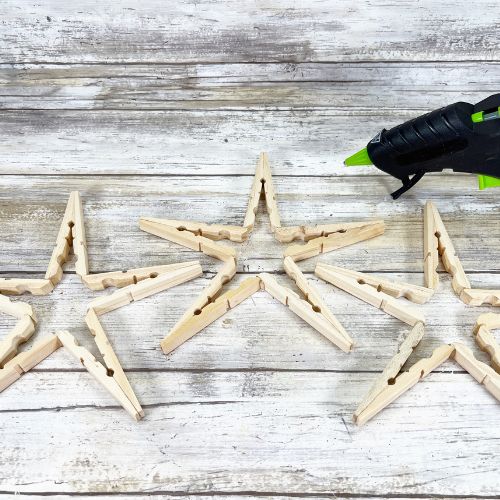
STEP FOUR
Dry fit the five V shapes into a star pattern using the photo as a guide or the pattern pdf provided.
Attach the two horizontal points to the top point using a glue gun and glue sticks.
Hold the points together until the glue has completely cooled. Then glue the two bottom points, holding the joints until the glue has cooled completely.
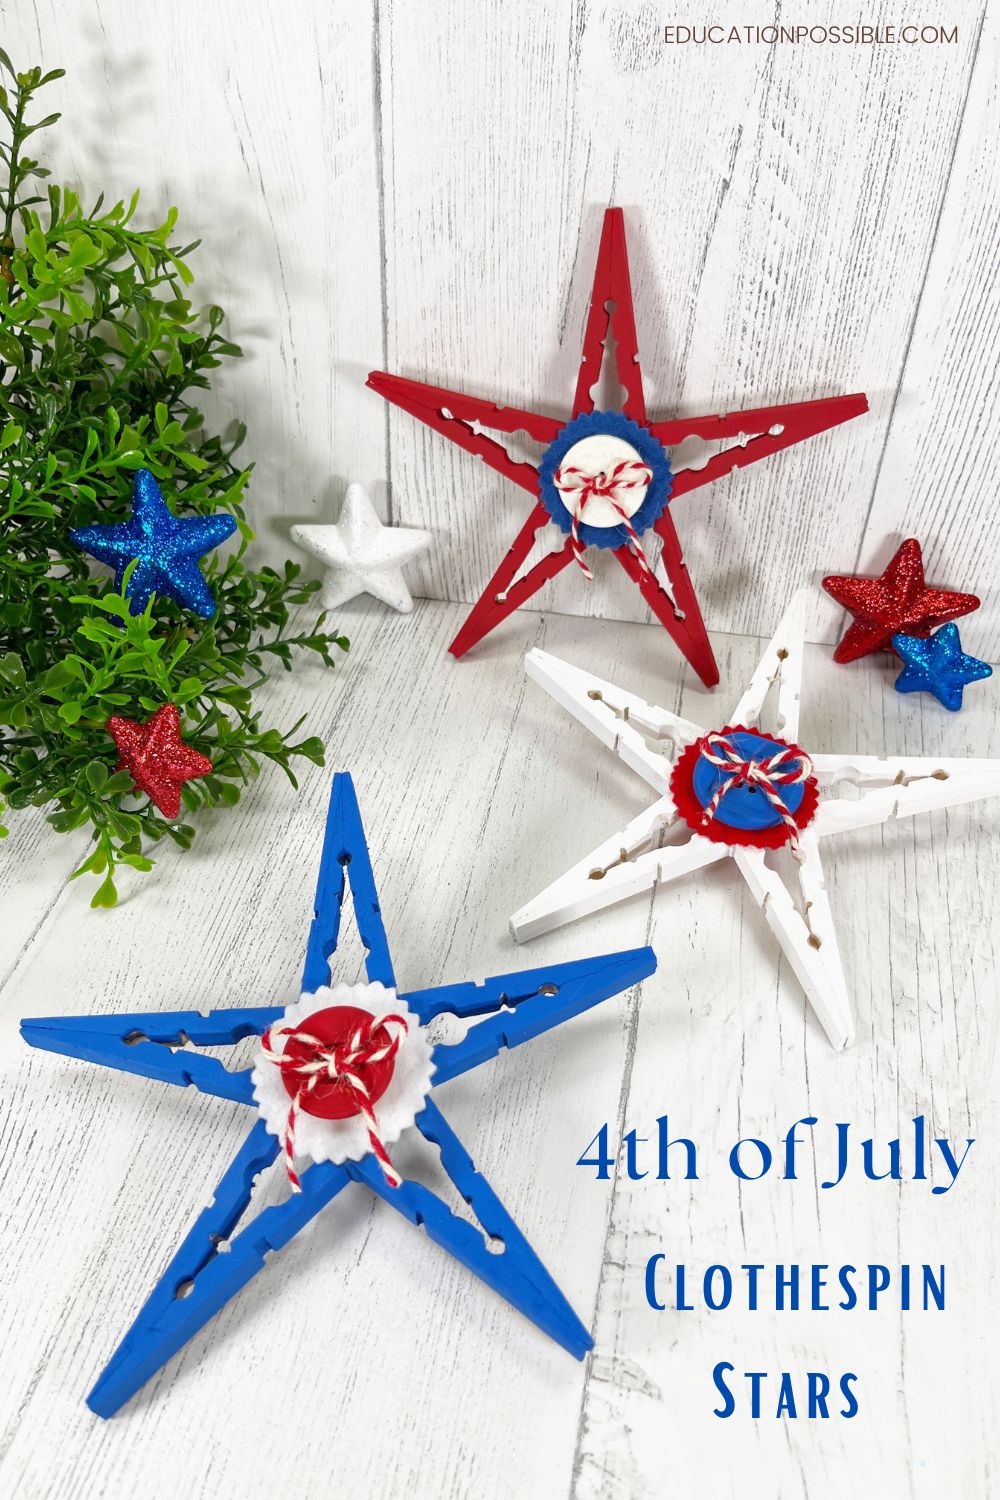
STEP FIVE
Paint the front and all sides of the first clothespin star with red acrylic craft paint. Paint the second star with white acrylic craft paint. Paint the third star with blue acrylic craft paint.
Let dry completely and apply additional coats of paint if necessary.
You want to have stars made of blue clothespins, white clothespins, and red clothespins.
STEP SIX
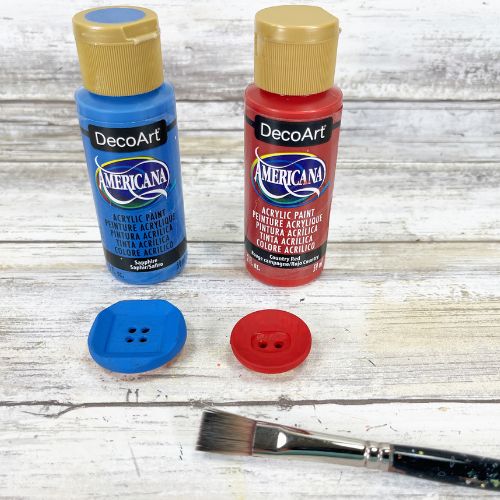
Select three buttons that are 1” in diameter - red, white, blue.
If you cannot find the correct size buttons in the correct color, then paint them with acrylic craft paint. Let dry completely, and apply a second coat of paint, if needed.
STEP SEVEN
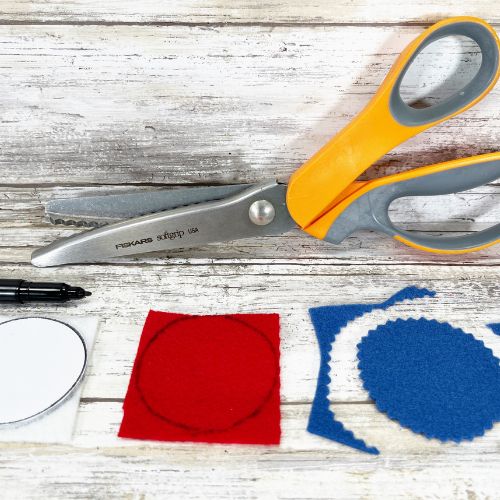
If you haven't already, download, print, and cut out the CLOTHESPIN STAR PATTERNS.
Trace the circle pattern onto red, white, and blue craft felt with a marker.
Carefully cut out the circles using pinking shears for fabric. Cut inside the traced lines for a clean, finished project.
STEP EIGHT
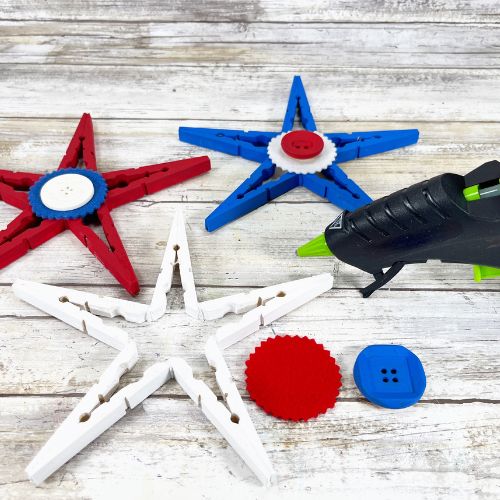
Layer the red, white, and blue felt circles in the center of the stars and attach them to the wood with a glue gun and glue sticks.
Glue the button to the center of the felt circle. Mix and match the colors, so each star has a red, white, and blue element.
STEP NINE
To finish the wooden stars, tie three bows with natural jute twine, trimming any long ends with scissors.
Attach each bow to the center of each button with a glue gun and glue sticks. You can also use baker’s twine, string, or a piece of ribbon if you do not have twine on hand.
Create this trio of Clothespin Stars to use as a hanging decoration, garland or standing decor piece. They are the perfect size for a tiered tray decoration.
These easy 4th of July crafts are a great way to celebrate the holiday.
Notes
If you'd prefer, you could make a 6-pointed star. Six clothespins will give you a snowflake star shape.
You can use liquid craft glue for this project, but you will have to wait for it to dry.
If you don't have felt, you can also use colored cardstock or craft foam for the circles.
Recommended Products
As an Amazon Associate and member of other affiliate programs, I earn from qualifying purchases.


Latest posts by Megan Zechman (see all)
- Easy Pumpkin Crafts - August 21, 2023
- Middle School Geography Curriculum - August 11, 2023
- Outdoor Geography Activities - August 4, 2023