Teaching Kids Life Skills: Sewing

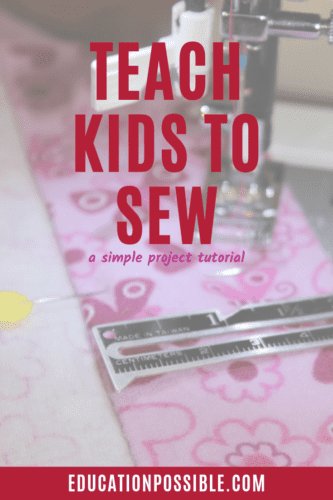
If you’re interested in teaching kids to sew, it’s best to start with an easy first sewing project, like this pillowcase. Sewing is one of those life skills for teens that I really want my kids to learn. Not only is it practical, but it’s also a fun hobby.
A couple of years ago, I taught my girls how hand sew and recently I moved them on to the sewing machine.
Of course, they wanted to jump right in and make a complete outfit for their American Girl doll. I gently told them that although they would eventually get to that, it’s probably not the best place to start learning how to use the machine.
This post contains affiliate links.
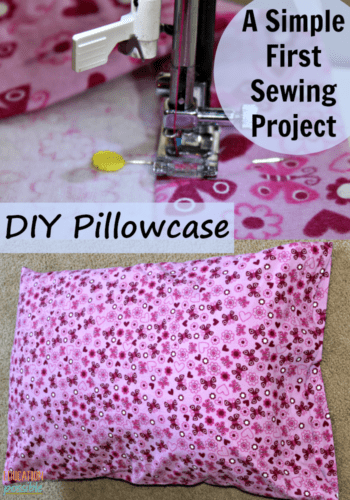
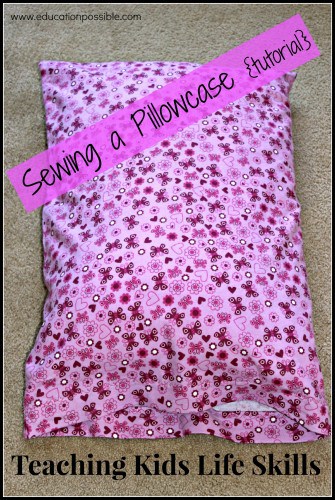
I’ve found that one of the best projects to start with is a one piece pillowcase. It takes a small amount of fabric and has all straight lines to sew. Plus, kids will get to use their creation regularly.
Sewing a Pillowcase
Fabric and Thread
Pick out a yard of soft cotton or flannel. They are both sturdy woven fabrics that are easy to work with. Take time to pre-wash it and iron out the wrinkles before cutting.
Choose a thread that matches your fabric.
Cutting
Fold your fabric in half, with the right side (patterned) together. Measure out 35” x 20” (should be most of your fabric).
You can make it a bit longer than 35″ if you have fabric left after preshrinking.
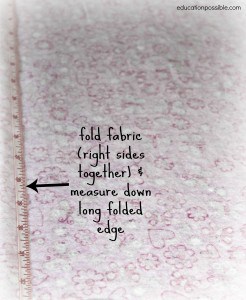
Make sure the longer measurement is the one on the fold. It will be one of the sides of your pillowcase.
Cut fabric as straight as you can.
Stitching
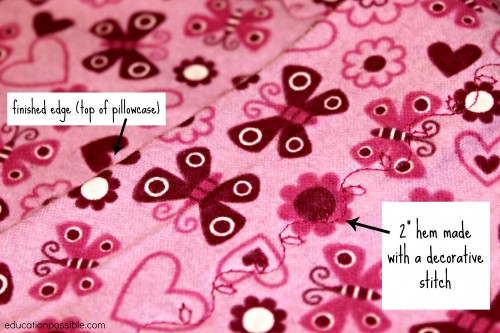
Open up the fabric and lay it out with the wrong side (no pattern) facing up. On one of the short ends, fold over a hem that is 1” and iron to create a crease.
Next, turn that over to make another hem, this time 2″. This is the open edge of your pillowcase.
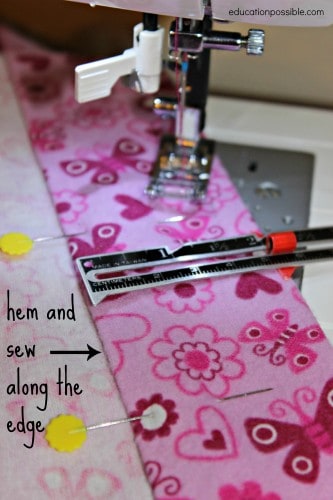
Pin the edge and sew along the crease. I chose to use a decorative stitch, instead of a straight stitch.
Fold the fabric, with right sides together, matching up the short ends of the fabric, including the part that you just sewed, and pin the long side together.
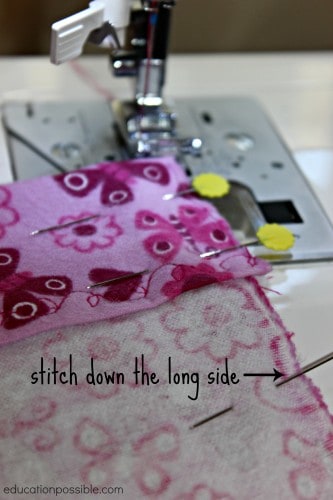
Stitch a ½” seam down the long side, starting at the hemmed end. At the opposite short end, sew a seam, closing the bottom of your pillowcase.
Cut off all loose thread.
Tip: Don’t sew the short end that you hemmed closed or you won’t be able to get your pillow into the pillowcase! Not that I’ve ever done that *ahem.
Turn the pillowcase right-side out and press.
As you can see, this is a great project for those who are new to sewing on a machine. The stitching is easy, yet you still learn a lot of techniques. If you’re ready for another sewing project, I have a tutorial for a block quilt and Minecraft stuffies. Two of these t-shirt projects also require a bit of sewing.
Want more practical ideas for teaching life skills for teens? Our Pinterest board is full of awesome tips!
What sewing projects have you been working on with your kids?

Latest posts by Megan Zechman (see all)
- Easy Pumpkin Crafts - August 21, 2023
- Middle School Geography Curriculum - August 11, 2023
- Outdoor Geography Activities - August 4, 2023
5 Comments
Comments are closed.
What a great lesson!! Thank you for sharing at Sharing Saturday!
You’re welcome Carrie. Thank you for your kind words. I hope lots of families rethink learning some sewing skills! Thank you for stopping by.
Love sewing with my boys! Thanks for sharing with After School!
You’re welcome Stephanie! I’m so happy that you sew with your boys. There are so many fun projects for them to make! Thank you for stopping by.