These Minecraft Stuffies are an Easy Sewing Project for Tweens
Is sewing on your list of life skills for teens you’re working on this year? Does your tween love Minecraft?
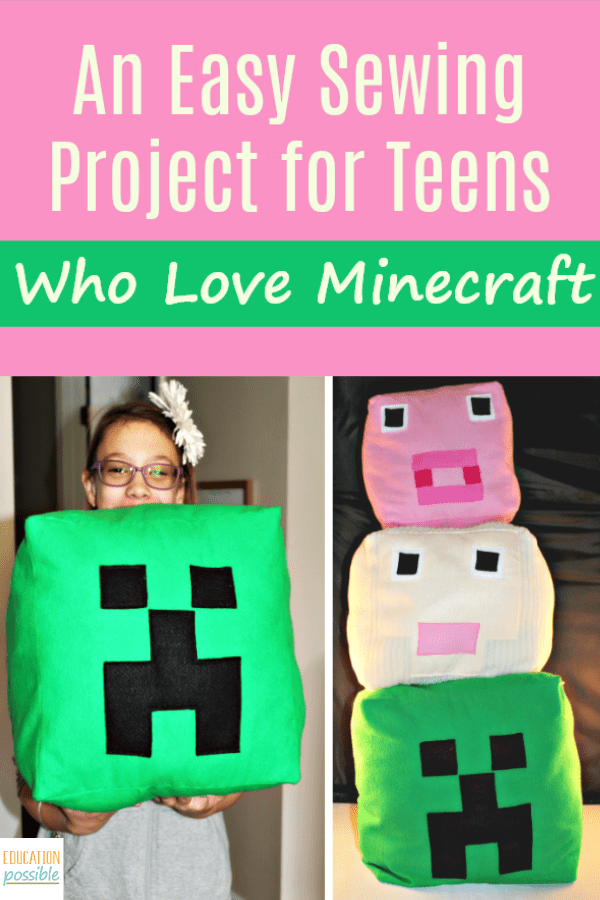
These Minecraft stuffies are the perfect sewing project for to start with. Your kids can build their sewing skills by making these adorable Minecraft stuffies.
Sewing is one of those skills that both of my girls showed an interest in, so I wanted to make sure I taught them how to hand sew and use a sewing machine.
When I was looking for sewing projects that my middle schooler would enjoy, I came across some cute stuffed Minecraft characters.
Any links in this post may be affiliate links. See my disclosure statement.
The blocks I found at DIY Ready were glued together, but I knew we could sew them just as easily. There are only straight lines to cut and sew, so this is a great project for kids who want to improve their basic machine sewing skills.
Minecraft Stuffies
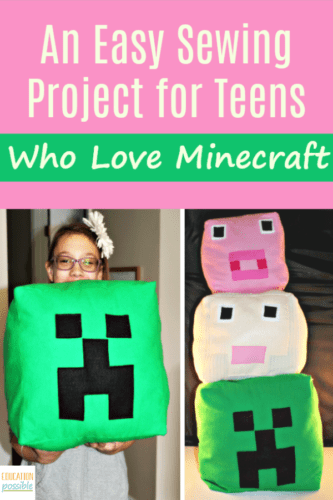
Marianna wanted to make three different sized plush characters: an 8″ pig, a 10″ sheep, and a 12″ creeper.
We purchased:
- Pig
- light pink brushed cotton (1/2 yard)
- medium pink brushed cotton (1/4 yard or less)
- bright pink brushed cotton (1/4 yard or less)
- white and black felt (1/4 yard or less)
- Sheep
- off-white terry chenille or brushed cotton (1/2 yard)
- cream felt (1/4 yard or less)
- light pink brushed cotton (1/4 yard or less)
- white and black felt (1/4 yard or less)
- Creeper
- bright green brushed cotton (1 1/2 yards)
- black felt (1/4 yard or less)
We also bought a large bag of polyester fiberfill.
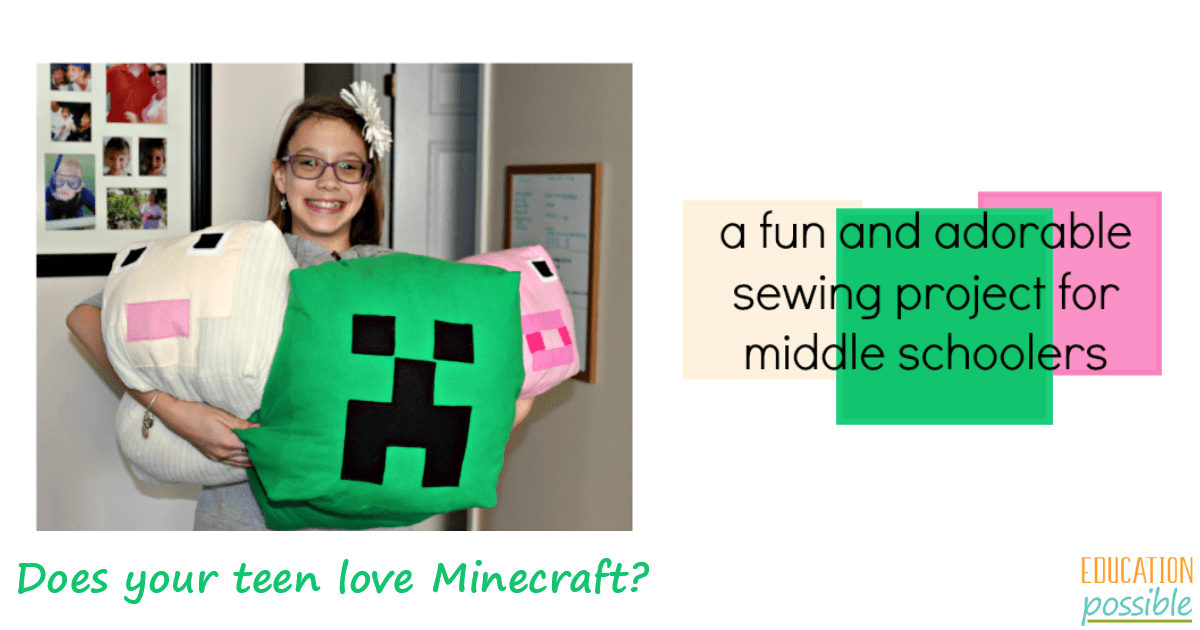
How to Make the Minecraft Face
First, measure and cut out all the pieces you’ll need for the project. Then take the pieces for the face and lay them out on one of the large squares. Don’t forget to leave room for the seam allowance. Once you have the face how you want it, pin everything.
Then, carefully sew around the edges of each face piece. Tip – If you want to put the black square on top of the white one, stitch the white one down first, then sew on the black.
Marianna chose thread a color that matched each piece. It meant changing the thread and bobbin a lot, but the faces look great, so it was worth it. Plus, it gave her a lot of practice winding bobbins and setting up the machine.
Cutting Measurements:
Pig
- (6) 9″ squares of the lightest pink fabric
- (2) 1.5″ squares of white felt (face)
- (2) 1″ squares of black felt (face)
- (2) 4″ x 1″ rectangles of the medium pink fabric (face)
- (2) 1″ square of the bright pink fabric (face)
Sheep
- (6) 11″ squares of the off-white chenille
- (2) 1.5″ squares of white felt (face)
- (2) 1″ squares of black felt (face)
- (1) 3.5″ x 2″ rectangle of the light pink fabric (face)
- (1) 9.25″ x 8.5″ piece of cream felt (face)
- Place the piece of cream felt that you just cut down so the long edge (9.25″) is lengthwise. Then, cut out a 2″ x 2.5″ rectangle from the two bottom edges.
Creeper
- (6) 13″ squares of the green fabric
- (2) 2″ squares of black felt (face)
- (1) 6″ x 6″ square of black felt (face)
- From the large black felt piece you just cut, cut out a 2″ x 2″ square from both of the top two edges. Then cut out a 2″ x 2″ square from the bottom edge, exactly in the middle. This is the creeper’s nose and mouth.
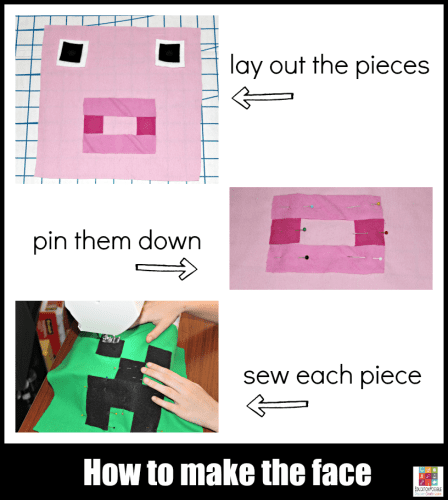
How to Sew the First 5 Squares Together
- With right sides together, pin then sew using a 1/2″ seam allowance (the right edge of the pressure foot):
- a fabric square to the right side of the face piece and a fabric square to the left side of the face piece
- a fabric square to the top of the face piece and a fabric square to the bottom of the face piece
- the left side square to the top square and the bottom square
- the right side square to the top square and the bottom square, giving you a block shape
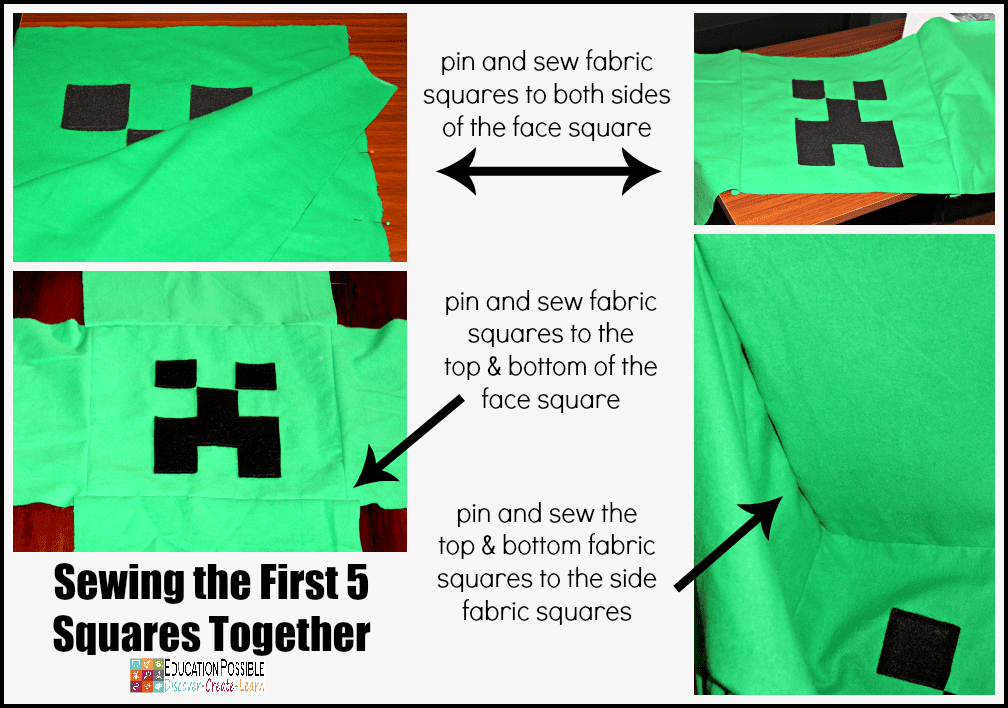
Finishing the Minecraft Plush
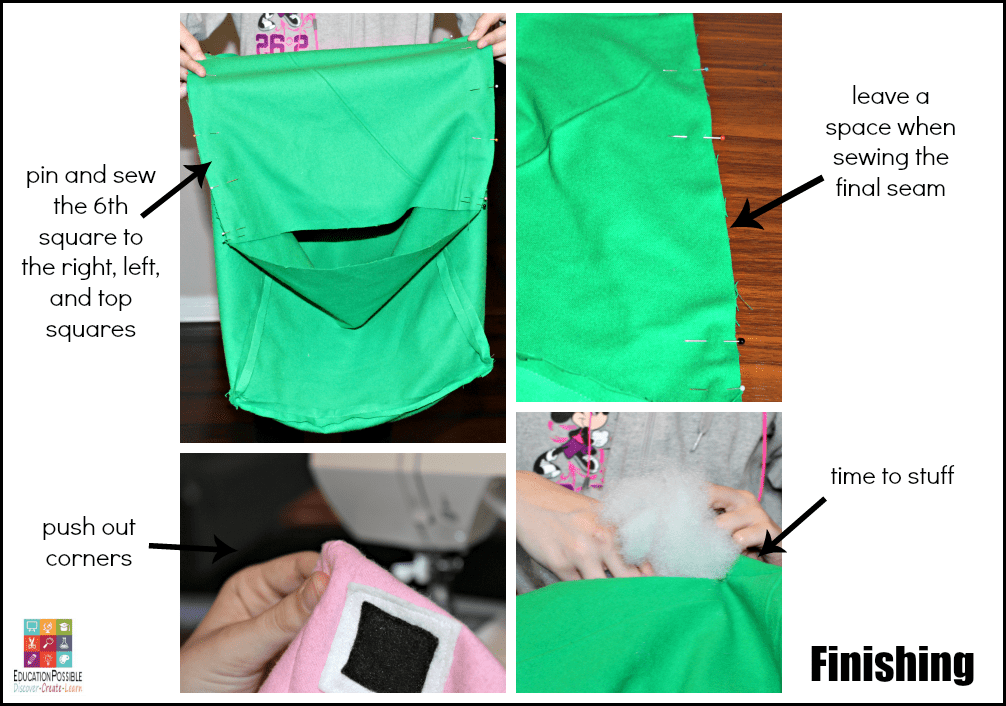
- Again, with right sides together, pin and then sew the remaining square to the right, left, and top squares.
- Pin the remaining seam, and sew it, leaving a space open (not sewn together) toward the middle so you can turn the fabric.
- Turn the fabric right side out. Use your finger to push out each of the corners from the inside.
- Stuff the block with the fiberfill, as full as you’d like it.
- Sew closed the opening. You can either hand sew it (if you want an invisible seam) or just use the machine (you’ll see the seam).
That’s it! I know it looks like a lot of steps, but it’s really quite easy, thanks to the square shape and straight seams.
Marianna is looking forward to making herself a whole Minecraft zoo!
More Minecraft and Sewing Ideas
- American Girl meets Minecraft
- Building an interactive history museum in Minecraft
- Here are some cool Minecraft gifts for tweens & teens
- Easy pillowcase sewing project
- Teach tweens to make a quilt
- Use a bit of sewing to make two of these recycled t-shirt crafts
Helpful Sewing Resources for Tweens
- The Best of Sewing Machine Fun for Kids – 37 Projects & Activities
- Kid’s Guide to Sewing
- Sewing School 2

These are adorable! I know even my sons would enjoy making these. They all know how to hand sew but I have been looking for some way to introduce the sewing machine. This might be just the project. Thank you.
That’s what lead me to these too Joanne. My daughter is starting to use the machine and I’ve struggled to find patters that weren’t overwhelming. This is all straight lines, so it was perfect!